Crowfall Crafting Guide

Crowfall Crafting Guide
Crafting in Crowfall can be rewarding but it may be more complex than other games you’ve played if you’re new to sandboxes, and even if you aren’t, it probably works differently than any other game you’ve played before. In Crowfall crafting there are two major phases, assembly, and experimentation, each highly important to the final outcome of the recipe.

Assembly
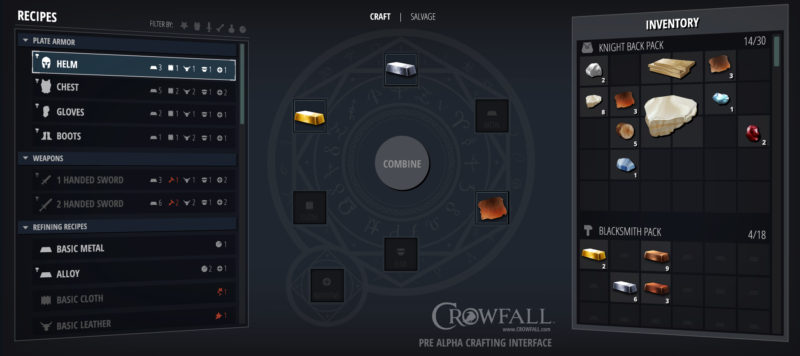
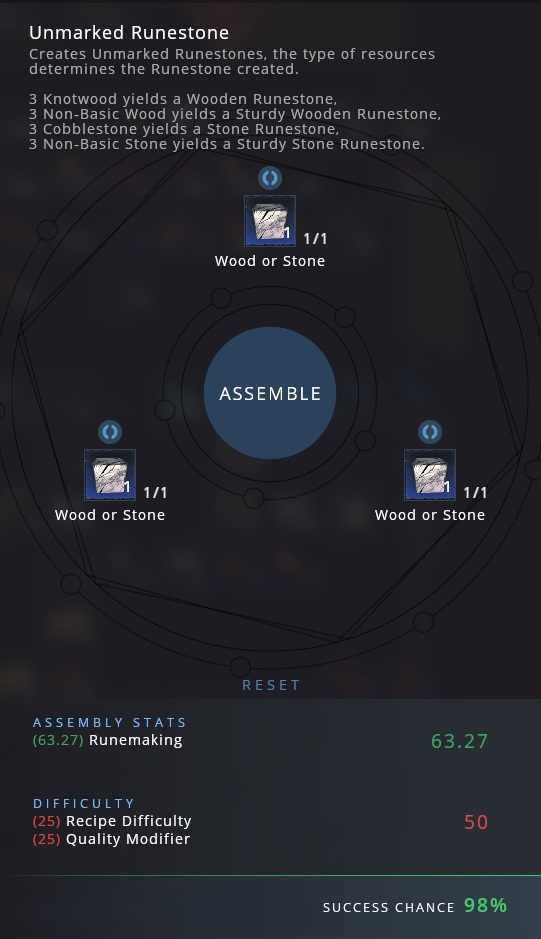
Item assembly is where you place components into the component slots of an item, and then hit assemble create the item. As simple as that sounds there are a few things to keep in mind during this process.
Component Types
Set – Set Items are when an item type is required to complete the recipe but will not change it.
Wildcard Agent – Wildcard Agents are non-optional components that allow you to select from a number of options. For instance any type of ore. Depending on the type used, different outcomes are possible for the final item.
Optional – Optional components are when a component is not required to complete the recipe, but can affect the outcome if included. For instance in creating campfires, you can make ones with just wood that regenerate health and mana, or include meat to regenerate foodbar as well.
Success & Failure
An item may succeed or fail during creation. Success will allow for experimentation if the item is one which allows for it and produce a higher grade item, while failure will disable experimentation and give a penalty to the grade outlined in the grade section below.
Grade
The grade of components used has a major effect on the grade of the final item. There are two ways an item grade can be determined.
All Same Grade – If all components are the same grade then a success will yield an item of the same grade as the components, while a failure will yield an item one grade lower.
Different Grades – If components are a different grade there is a chance the item will be any grade between the highest grade component used and lowest grade component used if the assembly is successful. The more components of a specific grade used, the greater the chance the item will be that grade. Upon a failure the item will be one grade lower than the lowest grade item used.

Experimentation
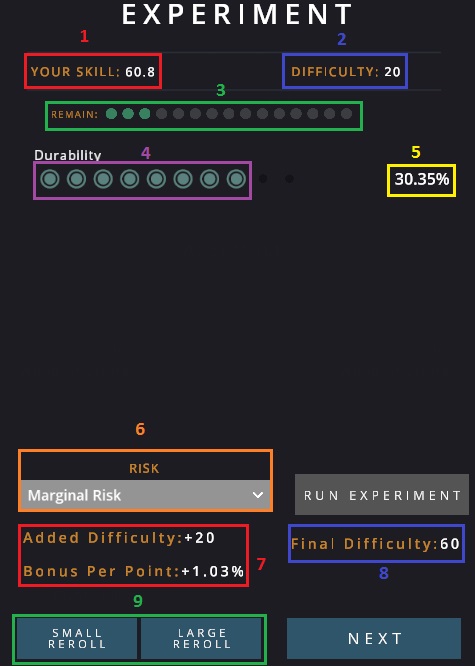
Experimentation is by far the most complex part of the crafting process. Once an item has been successfully assembled the experimentation process begins and you are brought the the window pictured above.
Window Elements
- This shows the value of your skill, including any bonuses you have from elements like food and equipment.
- This shows the base difficulty of the item you are trying to create. There are sometimes multiple elements here to put pips into.
- This shows how many remaining pips you have to put into item experimentation.
- This shows many pips you have into various item stats.
- This percentage reflects the overall success of rolling that stat after you click “run experiment”. While the stat is being rolled messages like “great success” or “critical failure” will pop up over this percentage as each pip is rolled.
- This is a drop-down menu that allows you select the difficulty of rolling. It directly affects elements 7 and 8.
- These elements show the added difficulty from the difficulty selection in element 6 as well as the added bonus to stat rolls.
- This is the final difficulty accounting for base item difficulty, difficulty added by item grade, and the difficulty modifier you selected.
- These are your reroll options. See reroll section for full description.
Rolling Stats
An experimental item will have one of more stats that allows for “pips” to be placed into it. The crafter will have a number of pips based upon their crafting skills. Placing pips into a stat allows you to roll on that stat to give it bonus of variable amount. The more pips placed into an item the higher the potential bonus will be. Once all pips have been allocated, or all potential stats to put pips into are full, the crafter may hit “Run Experiment” to roll the stats, though it is suggested you review the difficulty as outlined in the next section before doing so.
Difficulty
Difficulty is the chance that you will get successful rolls versus failures while rolling stats on an item. Difficulty is weighed against skill with higher skilled players able to average higher success on more difficult rolls. However less difficulty isn’t always better. By adjusting the difficulty with the slider in element 6, the player can grant a bonus to the power of their rolls. A general rule many crafters follow is trying to keep their skill level and final difficulty as close as possible.
Rerolls
Once you roll the stats on your item you will see each pip’s roll announce a varying degree of success or failure above the final percentages as it’s rolled. Pay attention to these rolls. An item that has a lot of successes (particularly great successes) is a well rolled item. An item with a lot of failures (particularly critical failures) is a poorly rolled item.
Rerolls allow you to reroll the lowest rolls on the item you are creating, with large rerolls granting rolls on many pips, while small rerolls grant rolls on a small number of pips. For items you want particularly high stats on, you can even do a large and then small reroll. Rerolls do come at a cost however. Items graded common, uncommon and rare have a dust cost associated with rerolls that increases as their grade does. Items graded epic and legendary have an ember cost associated with rerolls.
Overall it’s generally advisable to do a large reroll on any item you care much about, but if you watch the rolls and invest your rerolls wisely you may be able to invest your dust and embers more wisely.
Crafting Characters
Crafting can be accomplished from any character however one can greatly increase their chances of assembly and experimentation success by using characters developed specifically for the purpose of crafting.
Disciplines
Every major crafting type has a major associated with it that increases your ability in that profession. In addition each crafting type also has a “techniques” minor (for instance “blacksmithing techniques”) that unlock the full potential of a character with maximum passive skills in that profession. This alone makes it worthwhile to build crafting characters specifically for the type of crafting you aim to do with them.
Attributes and Racial Bonuses
Choosing your race and class can be a very important element to optimizing crafters. The following table shows the relationship between attributes and various crafting professions:
| Skill | Experimentation | Assembly |
|---|---|---|
| Alchemy | Intellect | Dexterity |
| Blacksmithing | Strength | Strength |
| Jewelcrafting | Dexterity | Dexterity |
| Leatherworking | Dexterity | Dexterity |
| Necromancy | Intellect | Dexterity |
| Runemaking | Intellect | Dexterity |
| Stonemasonry | Strength | Strength |
| Woodworking | Strength | Strength |
In addition each race has various bonuses related to crafting. They are as follows:
Crafting Relevant Racial Bonuses
Blacksmithing +10
Blacksmithing Experimentation +5
Woodworking +10
Woodworking Experimentation +5
Strength +30
Leatherworking +10
Leatherworking Experimentation +5
Woodworking +5
Woodworking Experimentation +10
Dexterity +30
Intellect +30
Leatherworking +10
Leatherworking Experimentation +5
Necromancy +10
Necromancy Experimentation +10
Dexterity +60
Intellect +30
Jewelcrafting +5
Jewelcrafting Experimentation +10
Woodworking +10
Woodworking Experimentation +5
Dexterity +60
Intellect +30
Necromancy +10
Necromancy Experimentation +10
Woodworking +10
Woodworking Experimentation +5
Strength +60
Leatherworking +5
Leatherworking Experimentation +10
Stonemasonry +10
Stonemasonry Experimentation +5
Intellect +30
Jewelcrafting +10
Jewelcrafting Experimentation +5
Leatherworking +10
Leatherworking Experimentation +5
Strength +30
Blacksmithing +10
Blacksmithing Experimentation +5
Leatherworking +10
Leatherworking Experimentation +5
Dexterity +30
Necromancy +10
Necromancy Experimentation +10
Stonemasonry +10
Stonemasonry Experimentation +5
Intellect +30
Blacksmithing +10
Blacksmithing Experimentation +5
Necromancy +10
Necromancy Experimentation +10
Strength +30
Jewelcrafting +5
Jewelcrafting Experimentation +10
Stonemasonry +10
Stonemasonry Experimentation +5
Blacksmithing +10
Blacksmithing Experimentation +5
Woodworking +10
Woodworking Experimentation +5
Other Considerations
In addition to the build elements listed above there are two more considerations to make. Gear, and food.
Armor and jewelry can be imbued with seals that give a bonus to crafting stats.
Various food items such as sumptuous pot pies exist that give crafting bonuses as well.
Crafted vessels with the right hands can also get a bonus to crafting experimentation skill.
The best crafters use the right race with the right class, allocate their attributes into the right stats, equip the right disciplines and gear, and eat the right food before crafting.