Crowfall Gathering Guide

Crowfall Gathering Guide
Gathering is one of the more unique elements of Crowfall. At its heart it has the same basics of most other MMOs, go out, find resource nodes, gather resources from them. However it implements a series of fairly unique features that bring a lot of skill and teamwork to the table. The following guide explores in detail the basic information every type of gatherer in Crowfall should know.
Resource Ranks
When gathering it’s important not only to find the right type of resources, but to find the rank best suited for your skills. Resources come in two varieties. Basic and ranked.
Basic Resources
Basics resources will always yield poor quality resources, but are very common and exceptionally easy to extract. The three basic resources are knotwood, cobblestone, and slag ore.
Ranked Resources
Ranked resources have a rank from 1 to 10. The rank denotes both the difficulty of dealing damage to the node, but also the potential to drop higher grade resources upon extraction. All ranked resources drop a minimum of common but have a chance to produced uncommon through legendary grade resources based upon their rank and how quickly they were extracted.
Extraction
Extraction of a node is the process of breaking it via damage. The amount of time that elapses between beginning the extraction of a node and finishing it has an effect on the quality of the drops. So doing more damage faster not only reduces time per node but also increases the value of each node. As such the skill of gathering comes in maximizing how much damage you can do per swing. It also is more effective in a group due to the ability to work together to down nodes quickly.
Node Damage
Every action you take in harvesting a node with a proper tool will produce damage (with the exception of motherloads, that sometimes resist damage). Damage is largely based on your skill including factors augmenting it such as passive training, tools, and gear, versus the difficulty of node extraction. In general damage can be as low as one per swing, and as high as 100 per swing. However through the use of skills and criticals more than 100 damage per swing may sometimes be achieved.
Criticals
Critical Prompt

Successful Critical

Sometimes while harvesting a small crosshairs icon will appear on the node you are extracting from. Aiming at this symbol as you initiate a swing will trigger a critical. Criticals deal an enhanced amount of damage to the node increasing the speed at which you harvest, and therefore the chances of a good end result.
Beneficial Harvest
Once you are trained far enough into the passive tree of your respective gathering skill, you’ll have the chance to produce a beneficial harvest effect. Beneficial harvest is a buff that has a chance to apply after the destruction of a resource node. If applied it gives increased critical harvest chance and movement speed allowing the player to move between nodes faster and gather from them more effectively. In addition, it can regenerate stamina with the proper passives trained.
Plentiful Harvest
Plentiful harvest affects the amount of resources dropped when extracting from a resource node. It’s increased by various passive skills and food bonuses, and decreased as a campaign’s seasons draws on. It can never be higher than five however, meaning that if you have a bonus of greater than five, that you can harvest at full effectiveness later into the campaign’s seasons.
Motherloads
Aurelium Motherload

Marble Motherload

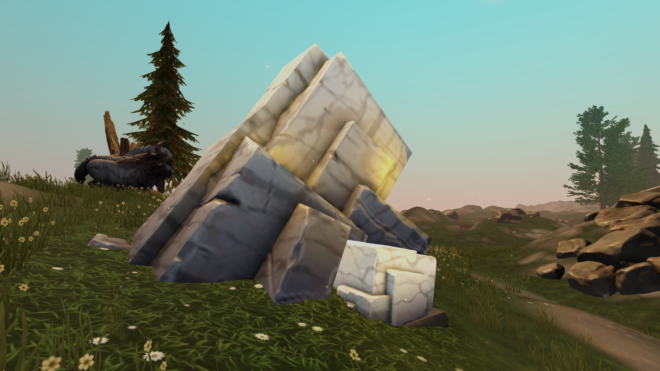
Motherloads are resource nodes designed to be extracted by groups. Currently they are only for miners and quarriers and are identifiable by their extreme size relative to other ore and stone nodes.
Motherloads have a damage resistance that cannot be broken past unless it takes enough damage within a defined period of time. A coordinated group of miners or quarriers can easily overcome this damage resistance, while solo gatherers will find it impossible damage them fast enough for useful extraction.
When a motherload is extracted quickly it drops plentiful resources both of low and high grades. In addition ore motherloads are the sole source of gems while stone motherloads are the sole source of minerals.
Gathering Characters
While it’s common to gather on combat characters due to the fact exploration discipline slots are available on every character and have no conflict with combat disciplines, the most serious gatherers may consider creating a character specifically to maximize their gathering potential. The following information will be useful both to the casual gatherer who gathers from a combat main, and the dedicated gatherer looking to optimize their gathering potential.
Attributes
In creating a character specifically for gathering the only part of a your race, class, and stat allocation that will have a direct impact on gathering effectiveness is your attributes. The following table demonstrates the relationship between attributes and the damage a character will deal to a resource node:
| Skill | Harvesting |
|---|---|
| Gravedigging | Strength |
| Logging | Dexterity |
| Mining | Strength |
| Quarrying | Strength |
| Skinning | Dexterity |
In addition, intellect increases “Spot Weakness” or the chance a critical circle will pop up. Strength increases “Exploit Weakness” or the damage from the critical. This is universally true for all types of gathering. Finally, it is worth noting that while spirit has no direct effect on harvesting, it does increase your stamina pool which can allow you to harvest longer between stam breaks.
Disciplines
Grave Digger / Logger / Miner / Quarryman / Skinner – Each of these disciplines increase the overall effectiveness of these professions in various ways, and it is generally advised to run the one that correlates with your primary gathering profession for that character.
Connoisseur – Grants an active that increases your chance to get useful secondary drops such as hunger shards or gems. Also grants a passive that causes apples to regenerate stamina.
Foreman – Grants a variety of actives and passives that make group harvesting more effective including an active that reduces motherload damage mitigation by 45%. A foreman is highly suggested for motherload mining groups.
Hoarder – Grants an active that allows you to burn health for stamina (with a 45 second cooldown) and a passive that automatically generates stamina upon critical harvests.
Lookout – Grants an active that increases critical chance.
Survivalist – Increases the chance of secondary harvest from trees and grants the chance to receive bloodworms. Also gives an active that increases harvest damage. A popular choice for loggers.
Villien – Reduces tool durability loss by half. Also grants an active that allows you to generate harvest pips (the resource used by other harvesting skills) for health. Thee most popular pick as a secondary exploration skill as it is exceptionally useful if you have high quality tools.
Ethereal Sight – Unlike the other disciplines listed here, ethereal sight is a minor making it a good choice for gathering focused characters, and a poor one for combat focused characters. Ethereal sight grants a bonus to the amount of dust generated while harvesting.
Energetic Harvesting
Unlike other ultimates, the energetic harvesting can be used very frequently, and has 5 different effects depending on how high you charge it up before using it. It works off of harvesting pips which is a resource only used by it and harvesting skills granted by the disciplines used above. Every two swings of a tool produce 1 harvesting pip. Activating this properly takes a bit of timing mastery, it can’t be activated mid swing so you’ll want to count your swings and prepare to active it at the end of the swing that generates your desired number of pips. Energetic harvesting can grant the following benefits:
1 Pip – Increase harvest skills by 5% for 8 seconds.
2 Pips – Increase chance to generate criticals for 8 seconds.
3 Pips – Restore 8 stamina.
4 Pips – Increases the magnitude of the 1-3 pip effects activated in the next 7 seconds.
5 Pips – Increase the base damage of your next two swings by 40 (Effect only lasts 6 seconds if not used)
Obviously some of these effects combo, so deciding upon and executing a good rotation can be highly beneficial to you.
Other Considerations
Gear can be crafted specifically to to grant bonuses to various harvesting skills. A plethora of different food options exist that grant a wide variety of bonuses to gathering as well. Lungs additives can also increase harvesting efficiency on crafted vessels.


